因为最近参加了一个比赛,培训的时候说最终考试是要求使用ruoyi-vue来做功能,于是我在网上找到了ruoyi这个项目,准备给他搭建起来。
找了一下官网 发现了这个 准备工作
然后我就开始查看本机环境
java --version
openjdk 21.0.8 2025-07-15
OpenJDK Runtime Environment (build 21.0.8+9-Ubuntu-0ubuntu122.04.1)
OpenJDK 64-Bit Server VM (build 21.0.8+9-Ubuntu-0ubuntu122.04.1, mixed mode, sharing)
mysql --version
mysql  Ver 8.0.43-0ubuntu0.22.04.1 for Linux on x86_64 ((Ubuntu))
还有个 Maven ,我发现这个我没有,就赶紧去装一个 还是apt命令老一套
sudo apt install maven
然后看看版本
mvn --version
Apache Maven 3.6.3
Maven home: /usr/share/maven
好了,然后去克隆仓库
就 git clone 呗
git clone https://gitee.com/y_project/RuoYi.git
然后,就是来到仓库下面,给那个 ruoyi-admin/src/main/resources/application-druid.yml 文件里面的连接数据库的信息改改,就是这段
            master:url: jdbc:mysql://localhost:3306/ry-vue?useUnicode=true&characterEncoding=utf8&zeroDateTimeBehavior=convertToNull&useSSL=true&serverTimezone=GMT%2B8
                username: rootpassword: root
配置完了,就把数据库也对应的导入一下。
mysql> create database `ry-vue` charset utf8mb4;
Query OK, 1 row affected (0.03 sec)mysql> use `ry-vue`
Database changed
然后导进去数据库文件 mysql> source /home/zhaoyao/script/java/RuoYi-Vue/sql/ry_20250522.sql;
好了,然后数据库创建好了。
来到仓库目录下,ll 命令看一下列表
ll
total 76K
drwxrwxr-x 2 zhaoyao zhaoyao 4.0K  9月  8 17:57 bin
drwxrwxr-x 2 zhaoyao zhaoyao 4.0K  9月  8 17:57 doc
-rw-rw-r-- 1 zhaoyao zhaoyao 1.1K  9月  8 17:57 LICENSE
-rw-rw-r-- 1 zhaoyao zhaoyao  10K  9月  8 17:57 pom.xml
-rw-rw-r-- 1 zhaoyao zhaoyao 9.7K  9月  8 17:57 README.md
drwxrwxr-x 4 zhaoyao zhaoyao 4.0K  9月 16 14:34 ruoyi-admin
drwxrwxr-x 4 zhaoyao zhaoyao 4.0K  9月 16 14:34 ruoyi-common
drwxrwxr-x 4 zhaoyao zhaoyao 4.0K  9月 16 14:34 ruoyi-framework
drwxrwxr-x 4 zhaoyao zhaoyao 4.0K  9月 16 14:34 ruoyi-generator
drwxrwxr-x 4 zhaoyao zhaoyao 4.0K  9月 16 14:34 ruoyi-quartz
drwxrwxr-x 4 zhaoyao zhaoyao 4.0K  9月 16 14:34 ruoyi-system
drwxrwxr-x 7 zhaoyao zhaoyao 4.0K  9月 16 14:33 ruoyi-ui
-rw-rw-r-- 1 zhaoyao zhaoyao 1.6K  9月  8 17:57 ry.bat
-rw-rw-r-- 1 zhaoyao zhaoyao 1.7K  9月  8 17:57 ry.sh
drwxrwxr-x 2 zhaoyao zhaoyao 4.0K  9月  8 17:57 sql
然后 执行 mvn clean install -Dmaven.test.skip=true
提示一大堆,然后就看到这个
[INFO] ruoyi .............................................. SUCCESS [  0.116 s]
[INFO] ruoyi-common ....................................... SUCCESS [  2.147 s]
[INFO] ruoyi-system ....................................... SUCCESS [  0.365 s]
[INFO] ruoyi-framework .................................... SUCCESS [  0.411 s]
[INFO] ruoyi-quartz ....................................... SUCCESS [  0.142 s]
[INFO] ruoyi-generator .................................... SUCCESS [  0.220 s]
[INFO] ruoyi-admin ........................................ SUCCESS [  0.865 s]
[INFO] ------------------------------------------------------------------------
[INFO] BUILD SUCCESS
[INFO] ------------------------------------------------------------------------
[INFO] Total time:  4.402 s
[INFO] Finished at: 2025-09-16T15:02:54+08:00
[INFO] ------------------------------------------------------------------------
说明这一步成功了,然后有可能中间提示什么没有ruoyi的文件夹来记录日志,那你手动创建一个 并且给权限就好了。
然后来到后端
cd ruoyi-admin/target
再执行
java -jar ruoyi-admin.jar
就看到了如下效果
java -jar ruoyi-admin.jar
Application Version: 3.9.0
Spring Boot Version: 2.5.15
////////////////////////////////////////////////////////////////////
//                          _ooOoo_                               //
//                         o8888888o                              //
//                         88" . "88                              //
//                         (| ^_^ |)                              //
//                         O\  =  /O                              //
//                      ____/`---'\____                           //
//                    .'  \\|     |//  `.                         //
//                   /  \\|||  :  |||//  \                        //
//                  /  _||||| -:- |||||-  \                       //
//                  |   | \\\  -  /// |   |                       //
//                  | \_|  ''\---/''  |   |                       //
//                  \  .-\__  `-`  ___/-. /                       //
//                ___`. .'  /--.--\  `. . ___                     //
//              ."" '<  `.___\_<|>_/___.'  >'"".                  //
//            | | :  `- \`.;`\ _ /`;.`/ - ` : | |                 //
//            \  \ `-.   \_ __\ /__ _/   .-` /  /                 //
//      ========`-.____`-.___\_____/___.-`____.-'========         //
//                           `=---='                              //
//      ^^^^^^^^^^^^^^^^^^^^^^^^^^^^^^^^^^^^^^^^^^^^^^^^^^        //
//             佛祖保佑       永不宕机      永无BUG               //
////////////////////////////////////////////////////////////////////
15:07:28.893 [background-preinit] INFO  o.h.v.i.util.Version - [<clinit>,21] - HV000001: Hibernate Validator 6.2.5.Final
15:07:28.894 [main] INFO  c.r.RuoYiApplication - [logStarting,55] - Starting RuoYiApplication using Java 21.0.8 on lnb000597chn with PID 73476 (/home/zhaoyao/script/java/RuoYi-Vue/ruoyi-admin/target/ruoyi-admin.jar started by zhaoyao in /home/zhaoyao/script/java/RuoYi-Vue/ruoyi-admin/target)
15:07:28.895 [main] DEBUG c.r.RuoYiApplication - [logStarting,56] - Running with Spring Boot v2.5.15, Spring v5.3.39
15:07:28.895 [main] INFO  c.r.RuoYiApplication - [logStartupProfileInfo,686] - The following 1 profile is active: "druid"
15:07:30.300 [main] INFO  o.a.c.h.Http11NioProtocol - [log,168] - Initializing ProtocolHandler ["http-nio-8080"]
15:07:30.302 [main] INFO  o.a.c.c.StandardService - [log,168] - Starting service [Tomcat]
15:07:30.302 [main] INFO  o.a.c.c.StandardEngine - [log,168] - Starting Servlet engine: [Apache Tomcat/9.0.108]
15:07:30.341 [main] INFO  o.a.c.c.C.[.[.[/] - [log,168] - Initializing Spring embedded WebApplicationContext
15:07:30.811 [main] DEBUG c.r.f.s.f.JwtAuthenticationTokenFilter - [init,242] - Filter 'jwtAuthenticationTokenFilter' configured for use
15:07:31.283 [main] INFO  c.a.d.p.DruidDataSource - [init,1002] - {dataSource-1} inited
15:07:31.697 [main] DEBUG c.r.s.m.S.selectDictDataList - [debug,135] - ==>  Preparing: select dict_code, dict_sort, dict_label, dict_value, dict_type, css_class, list_class, is_default, status, create_by, create_time, remark from sys_dict_data WHERE status = ? order by dict_sort asc
15:07:31.803 [main] DEBUG c.r.s.m.S.selectDictDataList - [debug,135] - ==> Parameters: 0(String)
15:07:31.820 [main] DEBUG c.r.s.m.S.selectDictDataList - [debug,135] - <==      Total: 29
15:07:32.185 [main] DEBUG c.r.s.m.S.selectConfigList - [debug,135] - ==>  Preparing: select config_id, config_name, config_key, config_value, config_type, create_by, create_time, update_by, update_time, remark from sys_config
15:07:32.186 [main] DEBUG c.r.s.m.S.selectConfigList - [debug,135] - ==> Parameters:
15:07:32.188 [main] DEBUG c.r.s.m.S.selectConfigList - [debug,135] - <==      Total: 8
15:07:32.538 [main] INFO  o.q.i.StdSchedulerFactory - [instantiate,1220] - Using default implementation for ThreadExecutor
15:07:32.546 [main] INFO  o.q.c.SchedulerSignalerImpl - [<init>,61] - Initialized Scheduler Signaller of type: class org.quartz.core.SchedulerSignalerImpl
15:07:32.547 [main] INFO  o.q.c.QuartzScheduler - [<init>,229] - Quartz Scheduler v.2.3.2 created.
15:07:32.547 [main] INFO  o.q.s.RAMJobStore - [initialize,155] - RAMJobStore initialized.
15:07:32.548 [main] INFO  o.q.c.QuartzScheduler - [initialize,294] - Scheduler meta-data: Quartz Scheduler (v2.3.2) 'quartzScheduler' with instanceId 'NON_CLUSTERED'Scheduler class: 'org.quartz.core.QuartzScheduler' - running locally.NOT STARTED.Currently in standby mode.Number of jobs executed: 0Using thread pool 'org.quartz.simpl.SimpleThreadPool' - with 10 threads.Using job-store 'org.quartz.simpl.RAMJobStore' - which does not support persistence. and is not clustered.15:07:32.548 [main] INFO  o.q.i.StdSchedulerFactory - [instantiate,1374] - Quartz scheduler 'quartzScheduler' initialized from an externally provided properties instance.
15:07:32.548 [main] INFO  o.q.i.StdSchedulerFactory - [instantiate,1378] - Quartz scheduler version: 2.3.2
15:07:32.548 [main] INFO  o.q.c.QuartzScheduler - [setJobFactory,2293] - JobFactory set to: org.springframework.scheduling.quartz.SpringBeanJobFactory@50211483
15:07:32.564 [main] DEBUG c.r.q.m.S.selectJobAll - [debug,135] - ==>  Preparing: select job_id, job_name, job_group, invoke_target, cron_expression, misfire_policy, concurrent, status, create_by, create_time, remark from sys_job
15:07:32.565 [main] DEBUG c.r.q.m.S.selectJobAll - [debug,135] - ==> Parameters:
15:07:32.567 [main] DEBUG c.r.q.m.S.selectJobAll - [debug,135] - <==      Total: 3
15:07:33.310 [main] INFO  o.a.c.h.Http11NioProtocol - [log,168] - Starting ProtocolHandler ["http-nio-8080"]
15:07:33.479 [main] INFO  o.q.c.QuartzScheduler - [start,547] - Scheduler quartzScheduler_$_NON_CLUSTERED started.
15:07:33.487 [main] INFO  c.r.RuoYiApplication - [logStarted,61] - Started RuoYiApplication in 4.842 seconds (JVM running for 5.188)
(♥◠‿◠)ノ゙  若依启动成功   ლ(´ڡ`ლ)゙  .-------.       ____     __        |  _ _   \      \   \   /  /    | ( ' )  |       \  _. /  '       |(_ o _) /        _( )_ .'         | (_,_).' __  ___(_ o _)'          |  |\ \  |  ||   |(_,_)'         |  | \ `'   /|   `-'  /           |  |  \    /  \      /           ''-'   `'-'    `-..-'
这说明后端启动成功,然后再开个命令行窗口来到前端 cd ruoyi-ui/
先执行
npm install
再执行
npm run dev
如果提示说 vue-cli-service 没权限 那你就给他加可执行权限就行
chmod +x node_modules/.bin/vue-cli-service
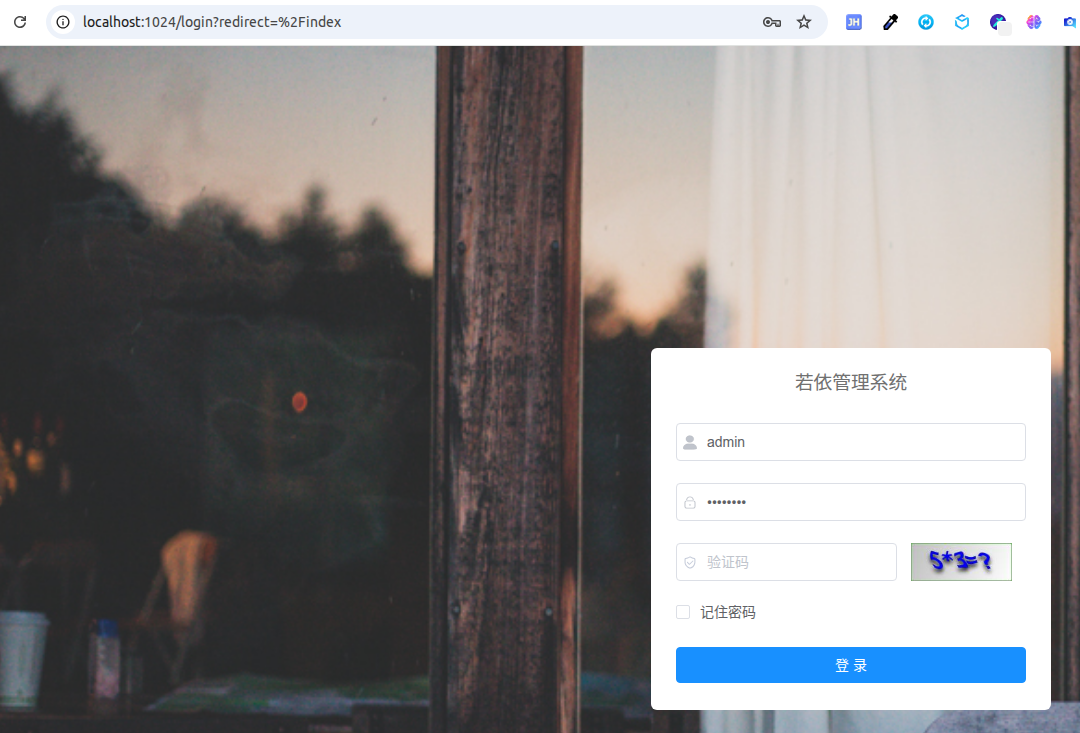
如果运行成功,会自动打开浏览器,就是这个界面
如果失败是有可能提示,ENOSPC: System limit for number of file watchers reached
那就按下面的做,不过这个重启后失效
# 临时将 max_user_watches 设置为 524288
sudo sysctl fs.inotify.max_user_watches=524288
# 使更改立即生效
sudo sysctl -p
想要永久生效,得改那个文件 /etc/sysctl.conf ,里面增加一行 fs.inotify.max_user_watches=524288
然后,好了,你就可以用这套系统了,这套系统总体来说上手难度不大,还能自动生成代码,也还是不错的。